
Post 27 of 29 in the AZ Hive series
Twenty-four chambers across six hives, one inner door per chamber. Twenty-four inner doors to build.
Each one is a small, flat wooden frame about the size of a large square dinner plate, screened in the middle and handled on the back. The build is straightforward, just repetitive.
The lumber. Each door is made from four boards of 1× material — the discount stuff at Home Depot, the kind with the purple paint stripe that marks it as a reject pile. The boards get cut to width and length, then the ends get shiplapped so adjacent boards interlock cleanly at the corners.
A shiplap joint here is a rabbet cut into each board end — half the thickness of the board — so that when two boards overlap at the corners, they nest into each other and the joint ends up the same thickness as the rest of the frame. The result is a corner with a lot of glue area for strength. I cut the shiplap by clamping each end into a jig and using my router set to the right depth to remove the half-thickness of wood.
The frame spacers. To hold the AZ frames, the inner door needs two spacers — flat plastic pieces that the frames slip into. We 3D-printed ours. To attach them, cut a saw kerf about ¼” deep across the width of the door’s inside face, about an inch in from the top and bottom edges. The slots get cut at this stage, before the hardware cloth goes on. The actual gluing of the spacers happens later — last, in fact, after everything else is built. Lay a bead of glue in the kerf, press the spacer in, wait until the glue sets.
The plastic spacers have held up pretty well, but with too much rough handling outside the hive they tend to break. Metal ones will eventually replace all the plastic ones.
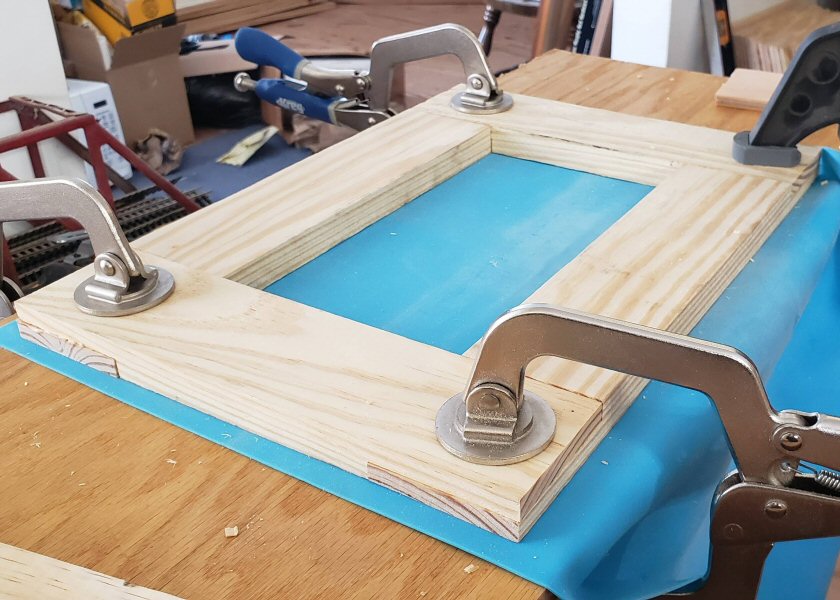
Assembly. Boards laid out to make a frame, glue along each shiplap, brad-nail the joints for mechanical reinforcement. Let dry. The result is a single wooden frame ready for the screen and handles.
The screen. Using another jig, I routed a ½” wide × 1/8″ deep ledge around the inner perimeter of the frame so the hardware cloth would sit flush with the inside surface once stapled. Then 1/8″ hardware cloth gets cut to fit the rectangular opening, dropped into the ledge, and stapled to the inside face. The hardware cloth is what makes the door a peeking window: I can look into a chamber without releasing any bees into the shed.
The handles. Two rectangular walnut pieces, with two edges coved for gripping, one on each side of the door. They get glued against the pine frame and brad-nailed from the inside of the door to hold until the glue dries. Walnut is a deliberate choice — durable, attractive grain, finished natural rather than painted. The big plastic screws on the locking bars press against these handles, so I wanted them to be durable.
Twenty-four doors. Same process for each one. A proverbial rinse and repeat until they were all complete.
The inner door is the part you touch every time you work the hive. It needs to have tight enough tolerances that no gaps let bees out, but not so tight you can’t remove it once propolis builds up. We typically have to flex the gap with a hive tool a few times, then grab the handles and wiggle while pulling. Those walnut handles have never failed despite all the pulling — but there are times I thought about adding some steel D-rings for the days the propolis is being stubborn.
Next: The Build, Part 4: Outer Doors and Finishing — the bigger doors that face into the shed, with chalkboard paint and magnet-receptive primer.