
Post 25 of 29 in the AZ Hive series
After the design was settled — frames, spacers, dividers, the four-chamber stack — it was time to actually cut wood.
The build started with templates.
Why templates first. Each side panel of the hive has a lot of identical features: locking-bar slots, rod holes, rod slots, divider supports. Cutting each one freehand on every panel would be slow and inaccurate — the kind of small variations that compound across four chambers and add up to a hive where doors don’t close and frames sit crooked.
The fix was to make a template first, then use it as a guide for every panel afterward. Cut once, repeat exactly.
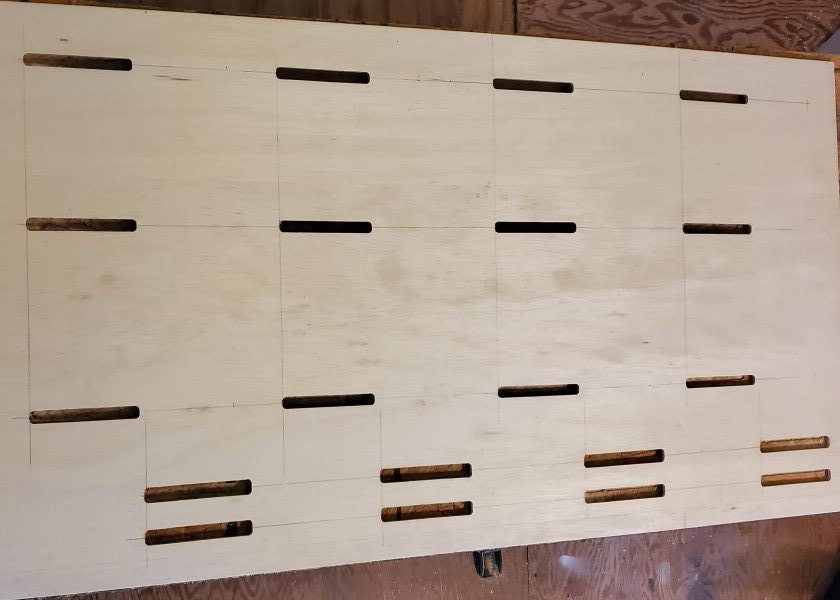
One template for both sides. The hive body has two different routed slot sizes: one for the inner-door locking bars, one for the frame support rods. I made one template that handled both. The only difference between the left and right side of each hive is that the left has holes for the support rods and the right has slots. For the left-side rod holes, I just plunge the router straight down — no sliding. For the right-side rod slots, I plunge and slide. Same template, two operations.
The plunge router. A portable plunge router with the right bushing makes this work. The plunge depth controls how deep the slot goes (¼” deep for the rod slots, deeper for the locking-bar slots). The template controls where the slot goes. As long as the template is held in the right position on the panel, the slot ends up exactly where the design says it should.
The side panels. Each hive has a left side panel and a right side panel. They’re mirror images, with one key asymmetry:
- Left side. Frame support rod holes. The rod goes in here.
- Right side. Frame support rod slots. The other end of the rod drops in here.
Both sides have the same locking-bar slots, divider supports (aluminum angle), and the bottom cutout for the IPM tray. The left/right asymmetry is just on the rod attachment.
Cutting the panels. Making the template took time. Lots of double-checking, measuring, marking. The cutting of the slots with the router didn’t take long at all once the template was ready: align the template, clamp it in several places, plunge, route. The only thing slowing me down was the need to move a clamp out of the way every now and then.
Six hives × two side panels = twelve side panels total. The template earned its keep many times over.
Next: The Build, Part 2: Making the Frames — 2×10 lumber, table saw coves, foundation slots, and how to turn dimensional lumber into bee frames.