
Post 19 of 29 in the AZ Hive series
The bees land outside the shed. The hives are inside. Something has to bridge that.
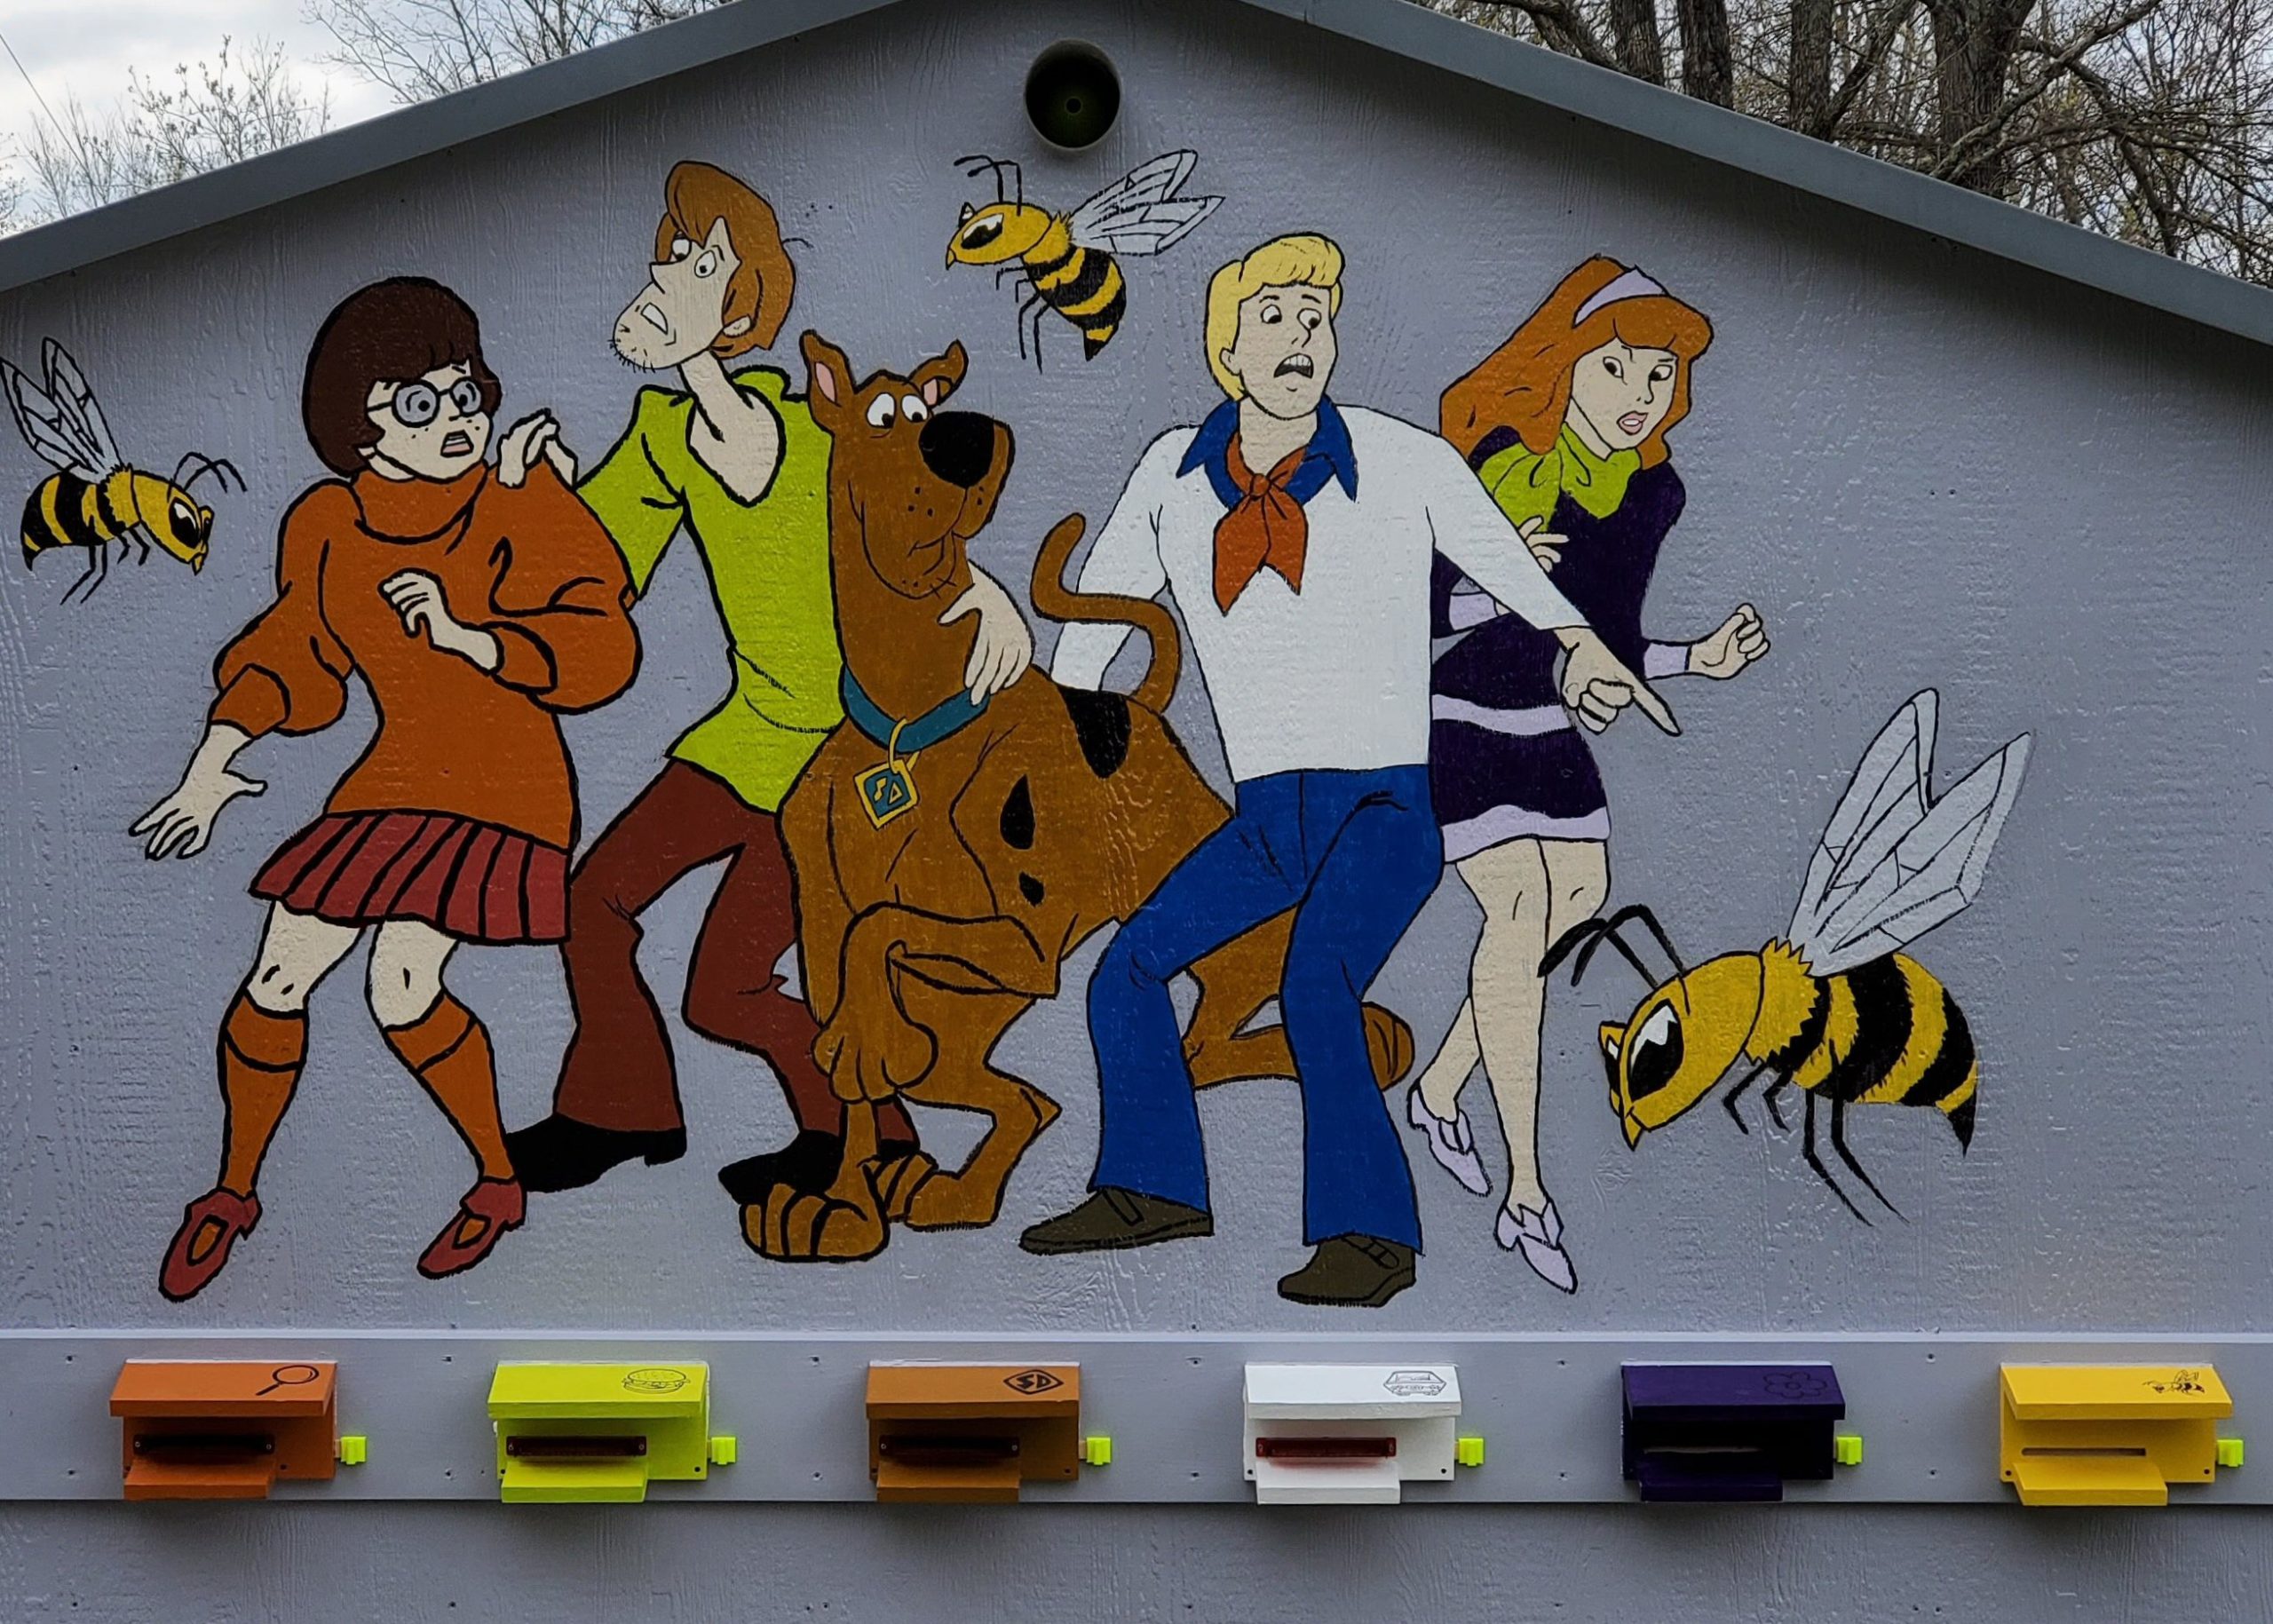
Six entrances, one per hive, each a small painted landing board with the character’s icon on it, mounted on the outside of the shed wall. Behind each entrance, a passage tunnels through the wall and connects to the hive on the inside. Bees fly to the entrance, land, walk through the passage, and they’re home.
The rim board. All six entrances mount on a single horizontal rim board that runs across the lower part of the shed wall. Before drilling anything, I laid all six painted entrance blocks out on the rim board at full scale and confirmed the spacing — the gap between hive entrances, the height off the ground, the alignment with the painted mural above. Easier to slide a block over an inch on a workbench than to recut a passage that’s an inch off.
Once the spacing was set, I drilled the rim board for each passage, then used the rim board as a template to mark and cut the wall openings.
The wall passages. Each passage is a short tunnel from the outside of the wall to the inside, sealed all the way around the edge so bees can’t get into the shed wall cavity. The passage opening lines up exactly with the hive’s entrance hole on the inside. From the bee’s perspective, it’s a continuous tube from landing board to hive. They were a bit of a pain to push through the fiberglass-insulated wall, but where there’s a will there’s a way. The passages also gave us a benefit I never expected: the narrow opening — ½” × 5″, spanning 6″ through the wall — is a fortified gauntlet that guard bees can easily defend.
Adjustable entrance reducers. Each entrance had a sliding reducer — a small movable plate that adjusts how wide the entrance opening is. Wide open in summer for full traffic. Reduced in winter, when a smaller opening is easier for the bees to defend and lets less cold air in. Reduced further during a robbing risk, when other colonies try to muscle their way in and steal honey. Basic beekeeping hardware, but having one per hive that I can adjust independently is one of the genuinely useful design elements.
After four years of bees and propolis, the adjective in “sliding reducer” shifted from “sliding” to “stuck.” This winter we redesigned them: a notched, wax-soaked wooden paint stick held to the entrance with two stainless Allen-head bolts. I have several notch sizes — from 3/4″ × 3/8″ at the smallest up to a 5″ wide-open notch. To close the entrance entirely, I just flip the stick upside down so no notch lines up with the passage.
April 11, 2021. The install order: wall passages first, sealed all around. Then the rim board, with the top edge and sides sealed against water. Then entrances and reducers — all ready for bees to find them, which (spoiler) happened the very next week.
Six painted icons. Six passages. Six reducers. All mounted on one rim board across the end of the shed, designed to keep the bees on the bee side and the beekeeper on the beekeeper side.
Next: Moving Day — the metal-pallet trick, Bobcat-and-tractor choreography, and the swarm that decided to show up on moving day.
Leave a Reply